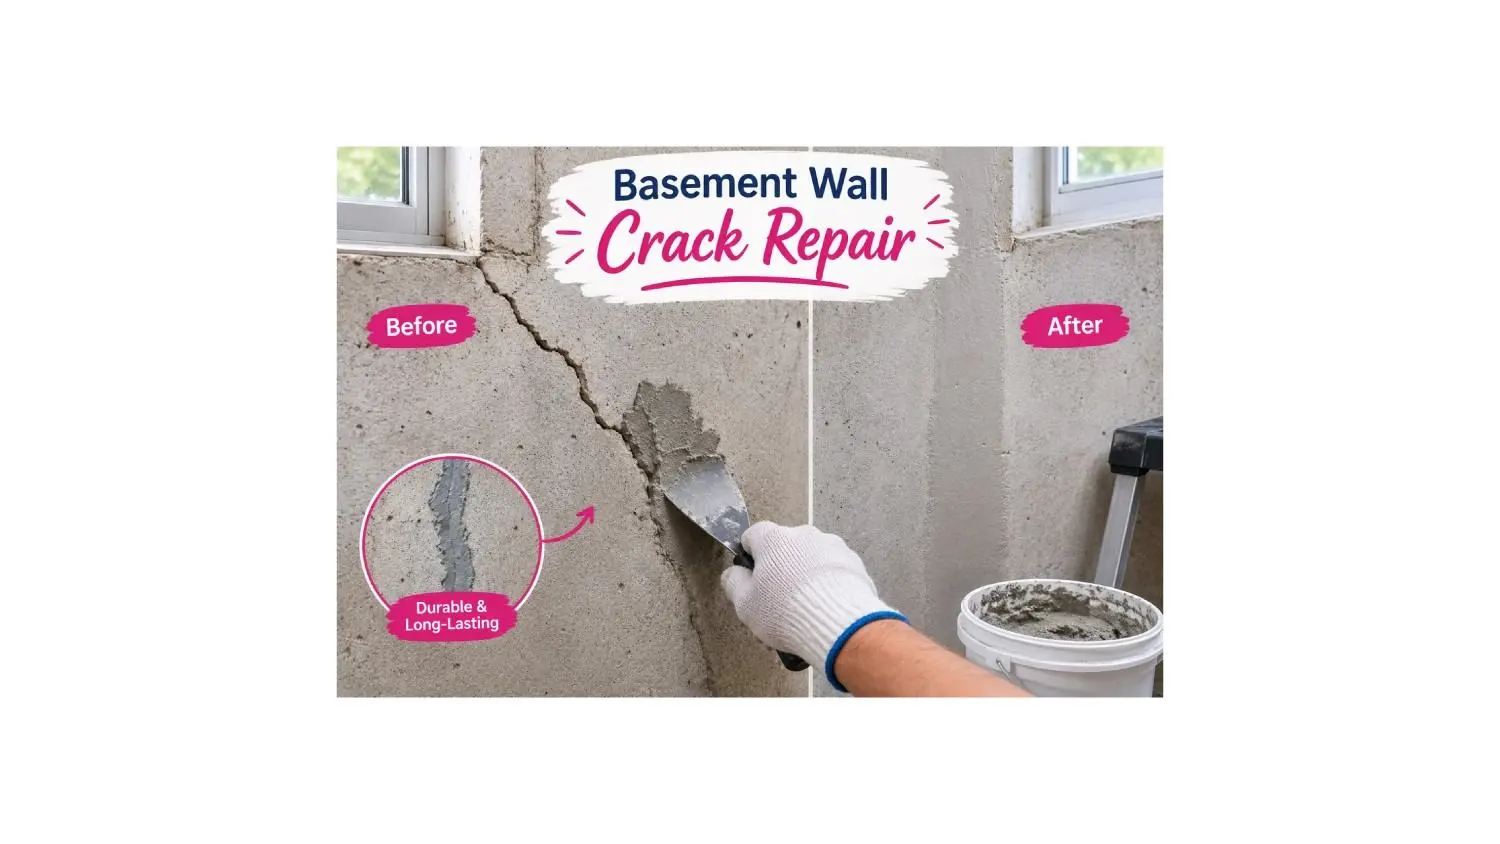
Basement Wall Crack Repair: How to Fix Cracks, Methods, and Costs
Finding a crack in your basement wall can be scary. Your mind may jump to foundation failure and huge repair bills. The good news is that most basement wall cracks are small, common, and fairly easy to fix. Concrete naturally shrinks as it cures, and many homes develop thin cracks within the first few years. Still, some cracks let in water, radon, and bugs, and a few are warning signs of real structural trouble that needs a professional.
In this guide, we explain basement wall crack repair in plain, simple words. You’ll learn how to tell harmless cracks from serious ones, what causes them, and which repair method works best for each type. We’ll walk you through DIY epoxy and polyurethane injection, hydraulic cement, and sealants step by step. You’ll also see what crack repair costs, when to call a pro or structural engineer, and how to keep new cracks from forming. By the end, you’ll know exactly what to do about the crack in your basement wall.
Quick answer: For thin vertical cracks in poured concrete walls, the best DIY basement wall crack repair is injection. Use polyurethane foam if the crack leaks water, or epoxy if you also want to bond the wall back together. Use hydraulic cement to plug an active leak fast, and concrete caulk for hairline cosmetic cracks. DIY kits cost about $40 to $150, and pro injection usually costs about $300 to $800 per crack. Call a structural engineer if a crack is horizontal, wider than about 1/4 inch, getting bigger, offset, or if the wall is bowing.
Call a pro right away if you see: horizontal cracks, a wall that bows or leans inward, stair-step cracks in block walls that keep growing, cracks wider than about 1/4 inch, one side of a crack sticking out past the other, or doors and windows upstairs that suddenly stick. These can point to foundation movement that sealing alone won’t fix.
Types of Basement Wall Cracks (and What They Mean)
The first step in any basement wall crack repair is figuring out what kind of crack you have.
| Crack type | What it looks like | Common cause | How serious? |
|---|---|---|---|
| Hairline vertical | Thin, straight up-and-down line | Concrete shrinking as it cures | Usually cosmetic; seal if it leaks |
| Vertical, wider (1/8 to 1/4 inch) | Visible gap, may leak | Shrinkage or minor settling | Usually minor; seal and monitor |
| Diagonal | Angled crack, often from a window corner, wider at one end | Uneven settling of the footing | Monitor; get it checked if it widens |
| Horizontal | Runs side to side, often midway up the wall | Soil and water pressure pushing the wall in; frost | Serious; call a structural engineer |
| Stair-step (block walls) | Zigzag along mortar joints | Settling or outside pressure | Moderate to serious, especially if wide or with bowing |
| Offset or displaced | One side sticks out past the other | Wall or footing movement | Serious; call a pro |
Crack Width Guide
- Hairline to 1/16 inch: Normal shrinkage. Seal for water and radon if needed.
- 1/16 to 1/8 inch: Usually minor. Seal and watch it.
- 1/8 to 1/4 inch: Seal or inject, and monitor for growth.
- Over 1/4 inch: Have a foundation pro or structural engineer inspect it before repairing. Some DIY guides say only cracks of an inch or more need a pro, but most foundation experts set the line much lower.
How to Monitor a Crack
Mark both ends of the crack with a pencil line and write the date next to it. Measure the width at its widest point with a ruler or a crack gauge, and take a photo. Check every month or two. If the crack gets longer or wider, it’s active, and you should get it inspected before sealing.
What Causes Basement Wall Cracks?
- Concrete shrinkage: Poured concrete loses water as it cures and shrinks, causing thin vertical cracks. This is the most common cause.
- Hydrostatic pressure: Water-soaked soil pushes hard against basement walls.
- Settling: Soil under the footing compresses or washes away, so parts of the foundation sink.
- Frost heave: Freezing soil expands and pushes on walls in cold climates.
- Expansive clay soil: Clay swells when wet and shrinks when dry, putting stress on walls.
- Poor drainage: Clogged gutters, short downspouts, and soil sloping toward the house soak the ground near the foundation.
- Tree roots and heavy equipment near the foundation.
Basement Wall Crack Repair Methods Compared
| Method | Best for | Stops leaks? | Adds strength? | DIY? | Rough cost |
|---|---|---|---|---|---|
| Polyurethane foam injection | Leaking cracks in poured walls | Yes | No | Yes | DIY $40 to $150; pro $300 to $800 |
| Epoxy injection | Dry, non-moving cracks; bonding the wall | Yes | Yes | Yes | DIY $50 to $150; pro $350 to $900 |
| Hydraulic cement | Plugging active leaks fast | Short term | No | Yes | About $15 to $40 |
| Concrete caulk or sealant | Hairline, cosmetic cracks | Minor seepage | No | Yes | About $10 to $30 |
| Mortar repair (tuckpointing) | Cracked joints in block walls | Some | Some | Yes, for small areas | DIY $20 to $50; pro varies |
| Exterior excavation and waterproofing | Leaks that keep coming back | Yes | No | No | Often $1,500 to $5,000+ per area |
| Carbon fiber straps, wall anchors, or steel braces | Bowing walls; horizontal cracks | No (needs sealing too) | Yes | No | Often $4,000 to $12,000+ per wall |
Rough ranges. Costs vary by crack length, wall type, access, and region.
Epoxy vs. Polyurethane: Which Should You Use?
This is the most common question in epoxy basement wall crack repair.
- Epoxy is a rigid adhesive that bonds the two sides of the crack back together. Once cured, it’s often stronger than the concrete around it. It needs a dry crack to bond well and cures slowly, so it fills the crack deeply. Because it’s rigid, if the foundation keeps moving, a new crack can form next to the repair.
- Polyurethane foam reacts with water and expands to fill the crack. It stays flexible, so it handles small seasonal movement better. It works well in damp or actively leaking cracks. It seals out water but doesn’t add strength.
Simple rule: Use polyurethane for leaking cracks. Use epoxy for dry cracks when you also want to restore strength, and only after you’re sure the crack isn’t growing. Neither one fixes the cause of a structural problem.
How to Repair Basement Wall Cracks: Step by Step
Here’s how to repair basement wall cracks yourself, from prep to finish. The right method depends on the crack and the wall.
Before You Start
- Confirm the crack is small, vertical or slightly diagonal, and not growing.
- Check whether your wall is poured concrete or concrete block. Injection works on poured walls. Block walls are hollow, so injected material can disappear into the cores.
- Gather safety glasses and gloves, since epoxy and foam can irritate skin and eyes.
- Remove paint, drywall, insulation, or framing covering the crack.
Method 1: Crack Injection (Epoxy or Polyurethane Kit)
Injection is the most reliable way to repair cracks in basement walls made of poured concrete. DIY injection kits usually include a two-part surface paste, plastic injection ports, and cartridges of epoxy or polyurethane.
- Clean the crack. Scrub the surface with a wire brush and vacuum out dust and loose concrete. Remove paint or sealer for about an inch on both sides. For epoxy, the crack must be dry. Dry damp spots with a hair dryer or heat gun, wait about 30 minutes, and make sure the moisture doesn’t come back.
- Place the ports. Attach injection ports along the crack, usually every 8 to 12 inches, starting near the bottom. Many kits suggest spacing ports about the same as the wall’s thickness. A small dab of paste on each port base holds it in place over the crack.
- Seal the surface. Mix the two-part surface paste and spread it over the entire crack and around each port base, about 1/8 to 1/4 inch thick and 1 inch wide. Leave the port openings clear. This “cap” keeps the injection material inside the crack.
- Let the paste cure. Wait the time on the label, often about 30 minutes to a few hours.
- Inject from the bottom up. Start at the lowest port. Inject slowly until material starts to come out of the next port up. Cap the first port, move to the next one, and repeat all the way up the wall. Go slow; rushing can blow out the surface seal.
- Let it cure. Allow 24 to 72 hours, depending on the product and temperature.
- Finish. Snap or cut off the ports. If you want a smooth wall, grind or scrape the surface paste flush.
Pro tip: Injected material can sometimes travel all the way through the wall and seal the crack on the outside face, which means you may avoid digging outside. That’s why injection is the preferred repair for leaking cracks in poured walls.
Method 2: Hydraulic Cement (for Active Leaks)
Hydraulic cement sets in just a few minutes, even with water flowing, and expands slightly as it cures to plug the gap.
- Chisel out the crack into an upside-down “V” shape (wider inside than at the surface) about 1/2 to 3/4 inch deep, so the cement locks in.
- Brush out debris and dampen the crack with water.
- Mix a small batch of hydraulic cement, only what you can use in 2 to 3 minutes.
- Press it firmly into the crack with a gloved hand or trowel and hold it for a minute or two while it sets.
- Smooth the surface and keep it damp for a while as it cures.
Limitation: Hydraulic cement is rigid. With freeze-thaw cycles and seasonal movement, the bond can break and the crack can leak again. Many contractors use it as a quick fix or to plug holes, then follow up with injection for a longer-lasting seal.
Method 3: Concrete Caulk or Epoxy Filler (for Hairline Cracks)
- Clean the crack with a wire brush and vacuum.
- Make sure it’s dry.
- Apply a flexible concrete crack sealant, or mix a two-part epoxy filler, and press it into the crack.
- Smooth it flush with a putty knife.
This is a surface fix only. It’s good for cosmetic cracks and minor dampness, but it won’t fill deep cracks the way injection does.
Method 4: Repairing Cracks in Concrete Block Walls
A crack basement wall repair on concrete block is different. Block walls usually crack along the mortar joints in a stair-step pattern. For small cracks:
- Rake out loose, cracked mortar to about 1/2 to 3/4 inch deep with a chisel or grinder.
- Brush out dust and lightly mist the joint with water.
- Pack in fresh mortar or a masonry patch with a pointing trowel.
- Smooth the joint to match the others.
If the blocks themselves are cracked, shifted, or the wall is bowing, call a foundation pro. Block walls are more likely to need reinforcement.
Crack in Basement Wall Repair Cost
Your crack in basement wall repair cost depends on the method, the crack size, and whether you hire a pro.
| Repair | Typical cost |
|---|---|
| DIY caulk or hydraulic cement | About $10 to $40 |
| DIY epoxy or polyurethane injection kit | About $40 to $150 per crack |
| Professional crack injection | About $300 to $800 per crack (often more for long cracks or warranty work) |
| Structural engineer inspection | About $300 to $1,000 |
| Exterior excavation and waterproofing at the crack | Often $1,500 to $5,000+ |
| Interior drainage system (full basement) | Often $3,000 to $10,000+ |
| Wall reinforcement for bowing walls | Often $4,000 to $12,000+ per wall |
| Major foundation repair (underpinning, piers) | Often $10,000 to $30,000+ |
Rough national ranges for 2026. Get at least two or three quotes, and ask what warranty comes with the repair.
Tip: Some foundation companies offer free inspections, but they also sell repairs. For cracks that look structural, an independent structural engineer can give an unbiased opinion before you spend thousands.
Does Insurance Cover Basement Wall Crack Repair?
Usually not. Most homeowner’s insurance policies don’t cover cracks caused by settling, shrinkage, soil movement, or normal wear. Coverage may apply if a crack is caused by a sudden covered event, so check your policy and talk to your insurer.
DIY vs. Professional Basement Wall Crack Repair
Many homeowners can repair cracks in basement walls themselves, but some jobs need a pro.
| DIY is fine if… | Call a pro if… |
|---|---|
| The crack is vertical or slightly diagonal | The crack is horizontal or stair-step and growing |
| It’s under about 1/4 inch wide | It’s wider than about 1/4 inch |
| It’s in a poured concrete wall | The wall is bowing, leaning, or displaced |
| It isn’t growing | It keeps getting longer or wider |
| Water seepage is minor | Water pours in or leaks return after repair |
| You can reach the whole crack | Doors and windows upstairs are sticking, or floors are sloping |
How to Prevent Basement Wall Cracks
- Manage water: Clean gutters and extend downspouts at least 4 to 6 feet from the house.
- Grade the soil so it slopes away from the foundation, about 6 inches over the first 10 feet.
- Keep soil moisture steady around the foundation, especially with clay soil.
- Maintain your sump pump and drainage system.
- Plant trees away from the house, at least as far as their mature height when possible.
- Seal small cracks early before water and freeze-thaw cycles make them worse.
Radon and Basement Wall Cracks
Cracks don’t just let in water and insects. They can also let in radon, a natural radioactive gas that comes from the soil. Sealing cracks helps reduce radon entry, but it usually isn’t enough on its own. Test your basement for radon with a simple test kit. The EPA recommends fixing your home if radon levels are 4 pCi/L or higher.
Finishing a Basement With Wall Cracks
Always repair cracks and fix leaks before finishing your basement. Once drywall and flooring go up, leaks can hide behind them and cause mold and rot. Many contractors also recommend a moisture barrier or insulation system on basement walls before finishing, since water vapor passes through concrete even without cracks.
Common Basement Wall Crack Repair Mistakes
- Sealing a structural crack without finding the cause
- Using epoxy on a wet or actively leaking crack
- Injecting a hollow concrete block wall
- Painting waterproof paint over a leaking crack, which usually peels
- Skipping the surface seal, so injection material leaks out
- Injecting too fast and blowing out the surface paste
- Ignoring outside drainage, so cracks keep coming back
- Covering cracks with drywall without fixing them first
Frequently Asked Questions
What is the best basement wall crack repair method?
For poured concrete walls, injection is best. Use polyurethane foam for leaking cracks and epoxy for dry cracks you want to bond structurally. Hydraulic cement is good for plugging active leaks quickly.
Are cracks in basement walls normal?
Yes. Thin vertical cracks are very common and are usually caused by concrete shrinking as it cures. They’re mostly cosmetic but should be sealed if they leak.
When should I worry about a crack in my basement wall?
Worry if a crack is horizontal, wider than about 1/4 inch, growing, offset, or if the wall bows. Also watch for sticking doors and windows upstairs. Call a structural engineer or foundation pro.
How much does crack in basement wall repair cost?
DIY kits cost about $40 to $150. Professional injection usually costs about $300 to $800 per crack. Structural repairs for bowing walls can cost thousands.
Is epoxy basement wall crack repair better than polyurethane?
It depends. Epoxy bonds and strengthens dry, stable cracks. Polyurethane is flexible and better for wet, leaking cracks. Many pros use polyurethane for waterproofing and epoxy when strength matters.
Can I repair cracks in basement walls myself?
Yes, for small, stable vertical cracks in poured concrete. DIY injection kits, hydraulic cement, and concrete caulk all work. Leave horizontal, wide, or growing cracks to a professional.
Is a crack basement wall repair a DIY job?
For small vertical cracks in poured concrete, yes. A crack basement wall repair with an injection kit takes a few hours plus curing time. Horizontal, wide, or growing cracks need a professional.
Can you repair a basement wall crack from the inside?
Yes. Most leaking cracks in poured walls can be fixed from the inside with injection, which fills the crack through the full wall thickness. Exterior excavation is usually only needed when inside repairs keep failing.
Does a horizontal crack mean my foundation is failing?
Not always, but it’s a warning sign. Horizontal cracks are often caused by soil and water pressure pushing the wall inward. Have a structural engineer check it, since the wall may need reinforcement.
How long does basement wall crack repair last?
A properly done injection repair can last for decades if the crack isn’t moving. Hydraulic cement and surface sealants usually last less time, especially with freeze-thaw cycles.
Final Thoughts
Most basement wall cracks are small, common, and fixable. For a thin vertical crack in a poured wall, a DIY polyurethane or epoxy injection kit is usually the best basement wall crack repair, with hydraulic cement as a quick plug for active leaks and caulk for hairline cracks. Clean the crack well, seal the surface, inject slowly from the bottom up, and let it cure.
But don’t ignore the warning signs. Horizontal cracks, bowing walls, wide or growing cracks, and offset cracks need a professional. Fix outside drainage, keep an eye on your walls, and repair small cracks early. A little attention now can save you from big foundation bills later.